Zebra Cookies: The Art and Joy of Black-and-White Baking
Introduction: When Cookies Turn Into Art
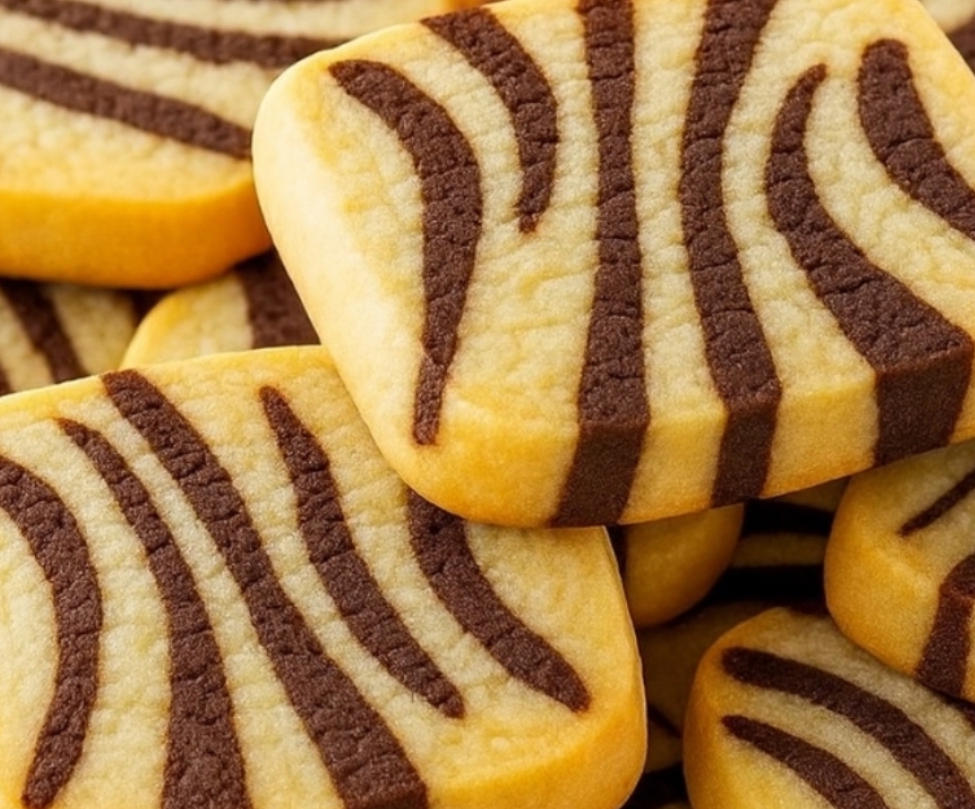
There’s something magical about Zebra Cookies. One look at their elegant black-and-white stripes, and you can’t help but smile. These cookies are more than just sweets; they’re a conversation piece, a show of creativity, and proof that baking can be both art and science.
Zebra Cookies — also known as Zebra Shortbread Cookies or Marble Slice Cookies — are buttery, crisp, and tender, with an irresistible balance of vanilla and chocolate. Their appearance, resembling the beautiful stripes of a zebra, makes them a delight for both the eyes and the taste buds.
In today’s baking culture where visual appeal is as important as flavor, Zebra Cookies stand out as a timeless treat. They’re perfect for festive occasions, tea parties, or as gifts for friends who appreciate edible elegance. But the best part? They’re surprisingly simple to make once you understand the method.
In this long-form guide, you’ll discover everything you need to know — from the history of patterned cookies, to the chemistry of butter and cocoa, to the step-by-step process of crafting those perfect stripes.
The Origin of Zebra Cookies
Zebra Cookies don’t have a single inventor or origin story; instead, they evolved from the centuries-old tradition of marbled and layered biscuits in Europe.
In the 19th century, shortbread cookies were a Scottish specialty — known for their buttery crumb and simplicity. Over time, bakers began experimenting with flavors like chocolate, coffee, and almond, creating layered or marbled patterns to make the treats visually striking.
By the early 20th century, the concept of patterned cookies spread across Europe and America. French bakers made sablé bicolore (two-toned shortbread), Italians baked biscotti marmorizzati, and Americans introduced checkerboard or pinwheel cookies during the holiday season. Zebra Cookies are the modern evolution of that — with their smooth contrast and clean zebra-like design, appealing to both kids and adults.
The Flavor Philosophy: Simplicity and Balance
Zebra Cookies work because of balance. Vanilla and cocoa — two classic flavors — complement each other perfectly. The vanilla dough brings warmth and buttery sweetness, while the chocolate dough adds depth and richness.
When baked together, the two layers fuse but remain distinct, creating a cookie that’s crisp on the outside, tender within, and visually stunning.
The secret lies not in complexity, but in precision — measuring ingredients correctly, chilling the dough adequately, and baking at just the right temperature to keep the stripes crisp and clean.
Ingredients: The Building Blocks of Beauty
To create perfect Zebra Cookies, you need to start with the right ingredients and understand why each one matters.
For the Vanilla Dough:
- 2 ½ cups (300 g) all-purpose flour
- 1 cup (225 g) unsalted butter, softened
- ¾ cup (90 g) powdered sugar
- 1 large egg yolk
- 2 tsp vanilla extract
- ¼ tsp salt
For the Chocolate Dough:
- 2 cups (250 g) all-purpose flour
- 1 cup (225 g) unsalted butter, softened
- ¾ cup (90 g) powdered sugar
- 1 large egg yolk
- 3 tbsp unsweetened cocoa powder
- ¼ tsp salt
Optional Enhancements:
- ½ tsp instant espresso (to deepen chocolate flavor)
- 1 tbsp milk (if dough feels too dry)
- Melted dark or white chocolate for dipping or drizzling
The Science Behind Each Ingredient
- Butter: The star of shortbread. Butter gives flavor, tenderness, and a melt-in-your-mouth texture. It also helps carry vanilla and cocoa aromas beautifully. Use high-quality unsalted butter for best results.
- Powdered Sugar: Unlike granulated sugar, powdered sugar gives a smoother texture and more delicate crumb. It dissolves faster, preventing gritty dough.
- Egg Yolk: Adds richness and a little structure. Too much egg can make cookies cakey — one yolk is just right.
- Flour: Provides structure. All-purpose flour is ideal here — it keeps the cookie firm but not tough.
- Cocoa Powder: The key to the zebra pattern. Choose Dutch-processed cocoa for a rich, smooth chocolate flavor and darker contrast.
- Salt: Enhances flavor balance and sharpens sweetness.
Equipment You’ll Need
- Mixing bowls
- Hand mixer or stand mixer
- Spatula
- Rolling pin
- Parchment paper
- Plastic wrap
- Sharp knife
- Baking trays
- Cooling rack
Having the right tools ensures clean lines and consistent baking results — essential for the striking zebra look.
Step-by-Step Recipe: Making Zebra Cookies
Step 1: Prepare the Vanilla Dough
In a large bowl, cream together the butter and powdered sugar until light and fluffy — about 2–3 minutes. Add the egg yolk, vanilla extract, and salt. Mix until smooth.
Gradually add the flour in three portions, mixing gently after each addition. Do not overmix — you want a soft, pliable dough, not a tough one.
Once the dough comes together, form it into a rectangle, wrap in plastic wrap, and chill for at least 30 minutes.
Step 2: Prepare the Chocolate Dough
Follow the same process as the vanilla dough, but sift the cocoa powder with the flour before adding. The cocoa will slightly reduce the dough’s moisture, so if it feels too stiff, add a tablespoon of milk.
Form into a rectangle, wrap, and chill alongside the vanilla dough for 30 minutes.
Step 3: Rolling and Shaping the Layers
Once chilled, roll out both doughs into equal-sized rectangles — about ¼ inch thick. Place the chocolate layer on top of the vanilla one.
Now comes the artistic part: to create zebra stripes, you can either:
- Slice thin strips of alternating doughs and stack them, or
- Press and fold gently to create marbled streaks.
Chill the stacked dough again for 15–20 minutes to firm it up before slicing. This ensures clean, distinct layers when cut.
Step 4: Shaping into a Block
Trim the edges for a neat rectangle. Press the dough layers gently to eliminate air pockets. Wrap tightly in plastic wrap and refrigerate for at least 1 hour (or up to 24 hours).
This chilling step is crucial. It firms the butter, ensuring the cookies hold their shape and the stripes stay sharp during baking.
Step 5: Slicing the Cookies
Preheat your oven to 350°F (175°C).
Using a sharp knife, slice the dough block into ¼-inch thick rectangles. You’ll see beautiful zebra-like stripes across each slice — dark chocolate intertwined with creamy vanilla.
Arrange them on parchment-lined baking trays, leaving a small gap between each cookie.
Step 6: Baking
Bake for 12–14 minutes, depending on size. The edges should turn a light golden color, while the centers remain pale.
Avoid overbaking — that’s how you preserve the delicate texture. Once done, cool on a wire rack completely before storing or decorating.
Step 7: Decoration (Optional but Fun!)
Though Zebra Cookies are gorgeous on their own, you can add flair:
- Dip half of each cookie in melted dark or white chocolate.
- Drizzle with melted chocolate for extra striping.
- Sprinkle a pinch of sea salt for a gourmet touch.
Tips for Success
- Temperature Control: Always chill your dough. It’s the secret to precision and clean stripes.
- Butter Quality: Use European-style butter for richer flavor and color.
- Sharp Knife: Slice cookies cleanly for perfect patterns.
- Uniform Thickness: Roll dough evenly — uneven layers bake inconsistently.
- Flavor Resting: Chill overnight for deeper flavor development.
kThe Baking Science: Why Chilling Matters
When you chill cookie dough, two important things happen:
- Butter solidifies, which prevents spreading and helps cookies hold their shape.
- Flour absorbs moisture, leading to a more cohesive, flavorful dough.
This rest period also allows gluten to relax, giving cookies their classic tender shortbread texture rather than a chewy one.
Flavor Enhancements and Variations
Once you master the base Zebra Cookie, you can play endlessly with flavors and colors.
Flavor Ideas:
- Mocha Zebra Cookies: Add instant espresso to the chocolate dough.
- Orange Zebra Cookies: Add orange zest to the vanilla dough and dip in dark chocolate.
- Matcha Zebra Cookies: Replace cocoa with matcha powder for a green twist.
- Red Velvet Zebra Cookies: Add red gel coloring and a touch of vinegar to the chocolate dough.
Texture Add-Ins:
- Chopped nuts (almonds, hazelnuts) for crunch.
- Mini chocolate chips.
- Coconut flakes for tropical flair.
Presentation and Storage
Let the cookies cool completely before storing. Place them in an airtight container, layering parchment between rows.
- Room temperature: 7–10 days.
- Refrigerated: Up to 3 weeks.
- Frozen: Up to 3 months (freeze before baking for freshest taste).
To thaw, bring the dough or baked cookies to room temperature naturally — microwaving ruins their texture.
Pairing Suggestions
Zebra Cookies pair beautifully with a variety of drinks:
- Coffee: The bitterness enhances the cocoa notes.
- Tea: Earl Grey or chamomile adds floral balance.
- Milk: Classic comfort pairing.
- Hot chocolate: For pure indulgence.
Serve them on a wooden tray or elegant plate for maximum visual effect — these cookies deserve to be admired before being devoured.
Health and Nutrition Insights
Though these cookies are indulgent, they can fit into a balanced lifestyle if enjoyed mindfully.
Healthier Tweaks:
- Substitute part of the butter with coconut oil.
- Use whole-wheat pastry flour for extra fiber.
- Replace some sugar with honey or coconut sugar.
- Add chia seeds or oats for texture and nutrition.
Cultural Interpretations: Black-and-White Symbolism in Food
Zebra Cookies represent more than just flavor — they’re a symbol of balance and contrast. The marriage of light and dark, vanilla and chocolate, simplicity and complexity mirrors ideas found in art, design, and even philosophy.
Across cultures, black-and-white desserts — from marble cakes to yin-yang pastries — celebrate harmony. The pattern evokes elegance, duality, and the beauty of opposites working together.
In a world of chaos, these cookies are a small reminder: even contrasts can coexist beautifully.
Behind the Scenes: The Art of Cookie Geometry
Professional bakers often use geometry to perfect Zebra Cookies. The pattern depends on consistent layering, slicing, and baking alignment.
- Uniform layers ensure symmetry.
- Clean edges prevent distortion.
- Proper chilling maintains the stripe integrity during baking.
Every cookie is like a miniature piece of edible art — equal parts mathematics and creativity.
The Joy of Homemade Baking
There’s something deeply satisfying about making Zebra Cookies from scratch. The rhythmic steps — creaming butter, rolling layers, slicing patterns — create a meditative rhythm.
Unlike store-bought sweets, homemade cookies carry warmth and intention. You know every ingredient, every effort that went into it. Sharing them with family or friends becomes an act of love.
And when you open the oven to reveal those perfectly striped cookies, it’s pure joy — a little victory you can taste.
Gifting Zebra Cookies
Pack them in clear jars or decorative boxes tied with ribbons. Their eye-catching design makes them perfect for holidays, birthdays, or tea party favors. Add a handwritten label that says “Handmade with love” — it’s the kind of gift people remember.
For professional bakers, Zebra Cookies also sell beautifully at markets and cafés because of their visual appeal and long shelf life.
Creative Twists: Beyond the Classic Zebra
Once you’ve mastered the traditional version, experiment:
- Rainbow Zebra Cookies: Use colored doughs for a playful twist.
- Zebra Sandwich Cookies: Spread chocolate ganache between two stripes.
- Zebra Ice Cream Sandwiches: Use them as layers for vanilla ice cream.
- Holiday Edition: Add crushed peppermint or cinnamon for a seasonal touch.
Each variation keeps the spirit of the original — that gorgeous striped identity — while offering a new taste experience.
Final Thoughts: Stripes of Joy
Zebra Cookies are proof that beauty and simplicity can coexist. They remind us that baking doesn’t have to be complicated to be impressive — it just needs care, precision, and creativity.
From their buttery vanilla base to their rich chocolate streaks, every bite tells a story of harmony and contrast. Whether you bake them for a festive celebration, a rainy afternoon, or simply to surprise a friend, these cookies never fail to spark delight.
So roll up your sleeves, dust your counter with flour, and make your kitchen smell like heaven. Once you’ve baked your first batch, you’ll understand why Zebra Cookies are more than just treats — they’re edible works of art.